How Can We Help?
-
1. Getting Started
-
2. Campaigns
-
- How to Change the Auto Dial Level in Ratio Mode
- How to Change the Dial Method
- How to Change the Hopper Level
- How to Change the List Order
- How to Reset the Hopper
- How to Setup Alternate Number Dialing
- How to Setup Alternate Number Dialing in Manual Mode
- How to Setup Dialing According to Lead's Time Zone
- How to Setup Preview Dial
- Types of Dial Methods
- What is the Hopper?
-
3. Leads
-
Users
-
Inbound
- Getting Started with Inbound
- How to Assign an In-Group to a Campaign
- How to Assign Users to an In-Group
- How to Auto Launch a Script or Webform for Inbound Calls
- How to Configure Inbound After Hours Settings
- How to Configure Inbound Calls in Queue
- How to Configure No Agent Available Settings
- How to Configure Users to Receive Inbound Calls
- How to Create an In-Group
- How to Route a DID Number to an In-Group
- How to Setup a Welcome Message
- How to Setup Inbound Queue Hold Music
-
Scripts
-
Audio
-
Call Times
-
Reports
-
Troubleshooting
-
For Agents
< Back
You are here:
Print
How to Assign Users to an In-Group
How to Assign Users to an In-Group
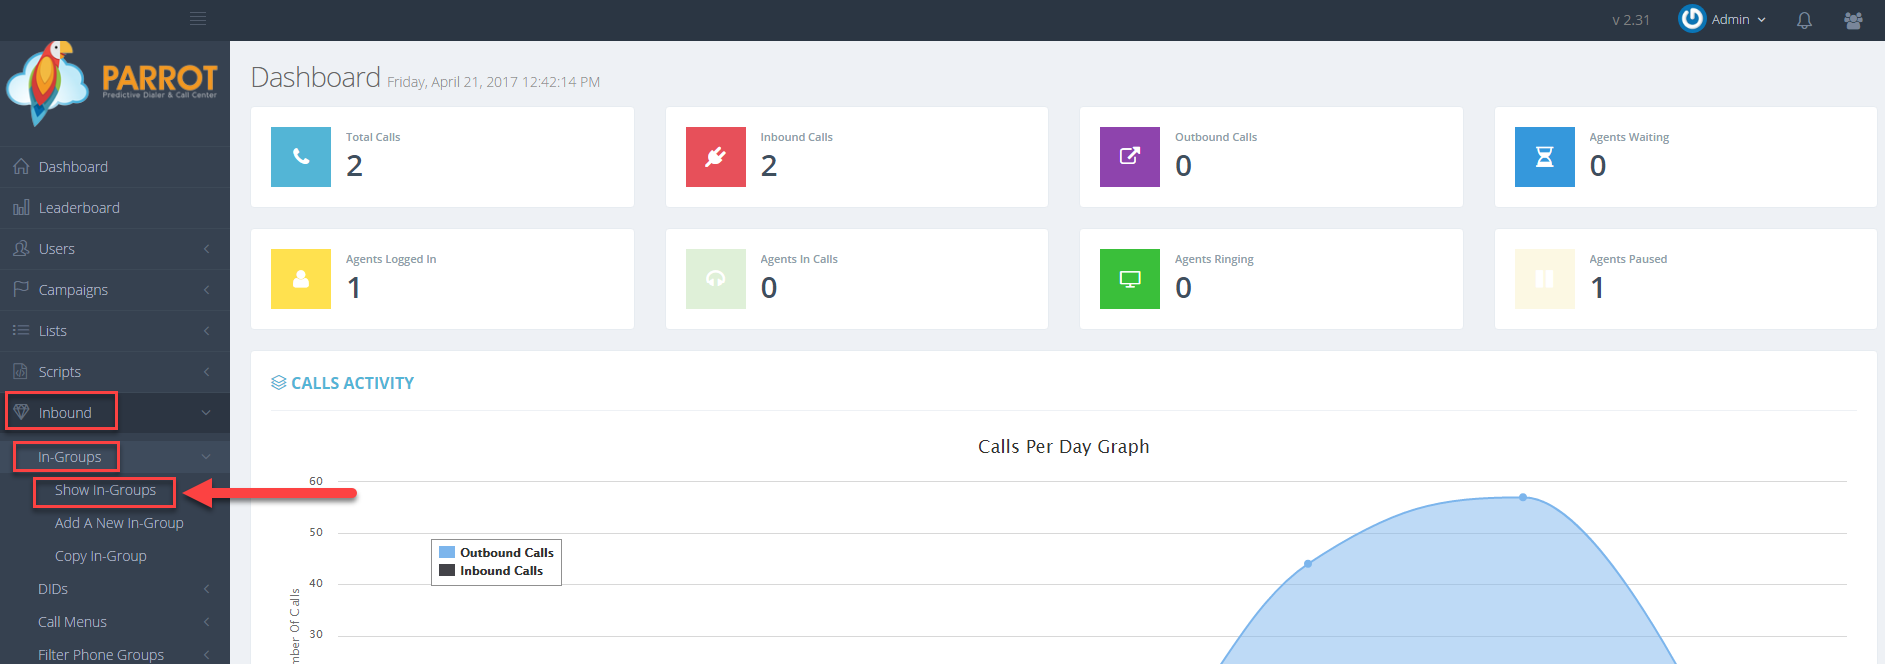
Step 1. Login to your manager portal using your Admin credentials. Step 2. Click on Inbound, then In-Groups, then on Show In-Groups in the left menu. Step 3. Select the In-Group that you would like to add users to and click the Modify button for that in-group.
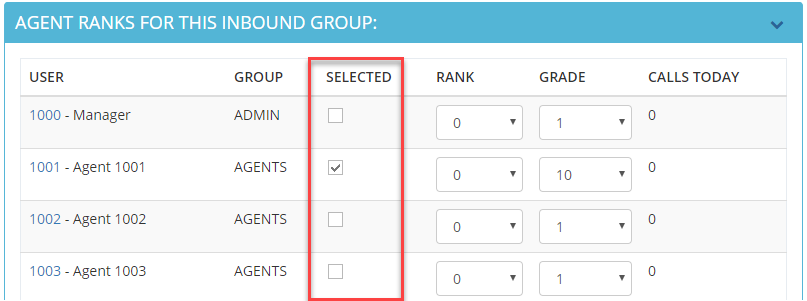
 Step 4. Scroll down to the AGENT RANKS FOR THIS INBOUND GROUP section and click on the arrow to expand . Select the checkbox by the user(s) that you want included in this in-group to receive inbound calls.
 Step 5. Click Save Changes.
