How Can We Help?
-
1. Getting Started
-
2. Campaigns
-
- How to Change the Auto Dial Level in Ratio Mode
- How to Change the Dial Method
- How to Change the Hopper Level
- How to Change the List Order
- How to Reset the Hopper
- How to Setup Alternate Number Dialing
- How to Setup Alternate Number Dialing in Manual Mode
- How to Setup Dialing According to Lead's Time Zone
- How to Setup Preview Dial
- Types of Dial Methods
- What is the Hopper?
-
3. Leads
-
Users
-
Inbound
- Getting Started with Inbound
- How to Assign an In-Group to a Campaign
- How to Assign Users to an In-Group
- How to Auto Launch a Script or Webform for Inbound Calls
- How to Configure Inbound After Hours Settings
- How to Configure Inbound Calls in Queue
- How to Configure No Agent Available Settings
- How to Configure Users to Receive Inbound Calls
- How to Create an In-Group
- How to Route a DID Number to an In-Group
- How to Setup a Welcome Message
- How to Setup Inbound Queue Hold Music
-
Scripts
-
Audio
-
Call Times
-
Reports
-
Troubleshooting
-
For Agents
< Back
You are here:
Print
How to Add a List
How to Add a List
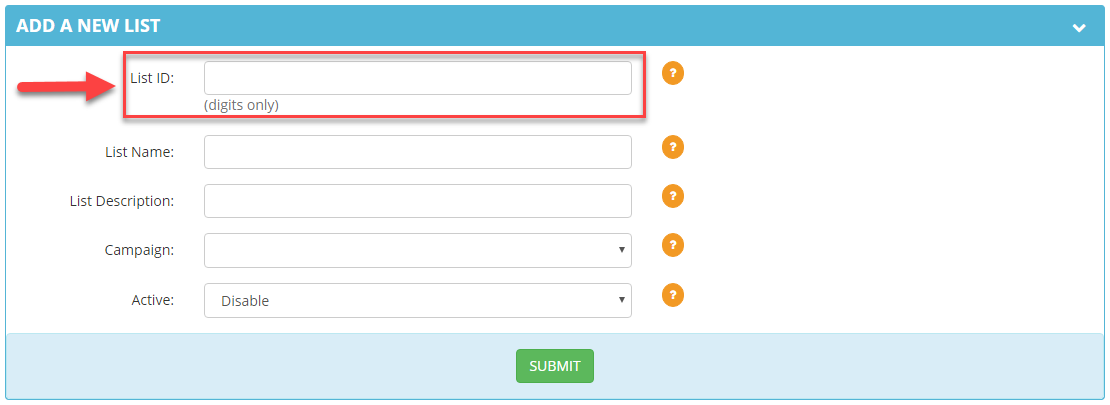
A list is simply a container for the lead file. Every campaign needs at least one list. You can keep loading leads into one list or create and manage different lists in one campaign. Step 1. Login to your manager portal using your Admin credentials. Step 2. Click on Lists and then Add a New List in the left menu.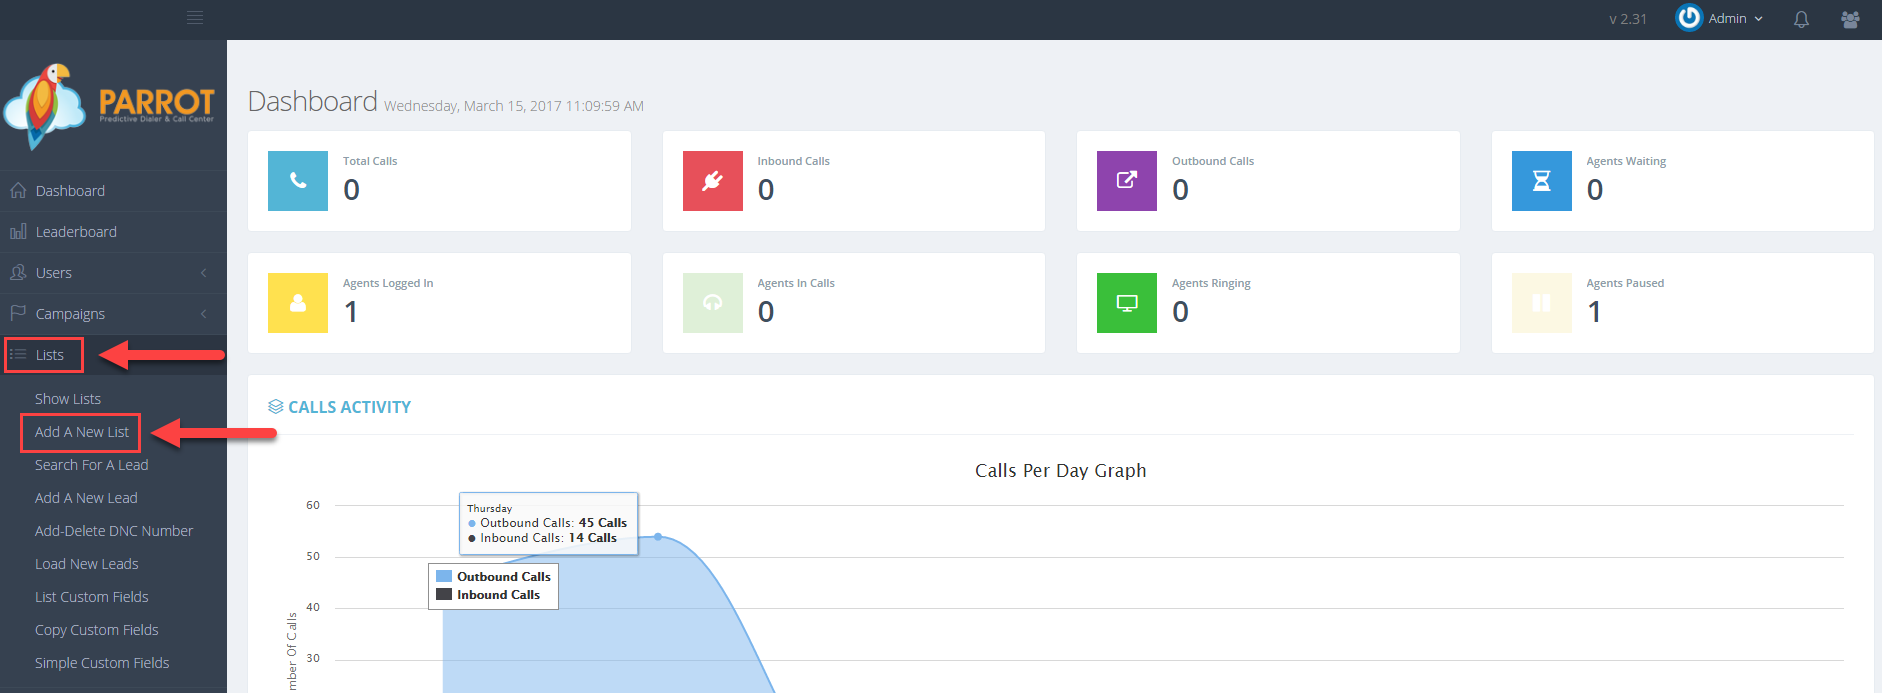 Step 3. Enter a numerical name, between 3-8 characters, greater than 99 for the List ID. Note: This field is NOT editable once submitted.
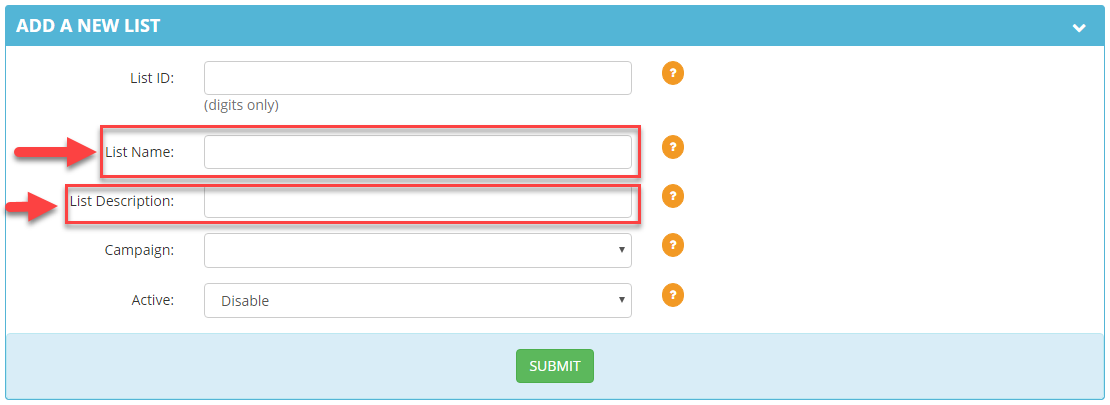
 Step 4. Enter a name, between 2-20 characters, for the List Name. Enter an optional List Description.
 Step 5. Select the Campaign that you want this list added to from the drop down menu.
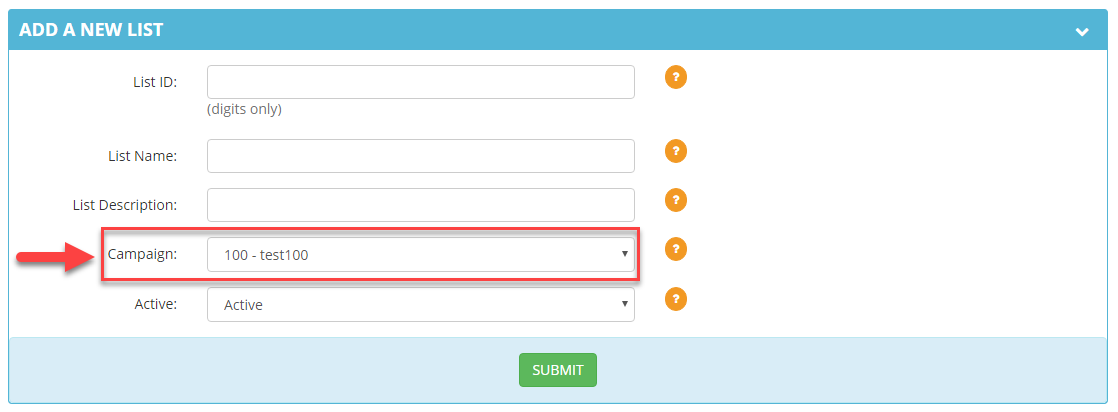 Step 6. Select from the dropdown if you want this list Active or Disable if you do not want active.
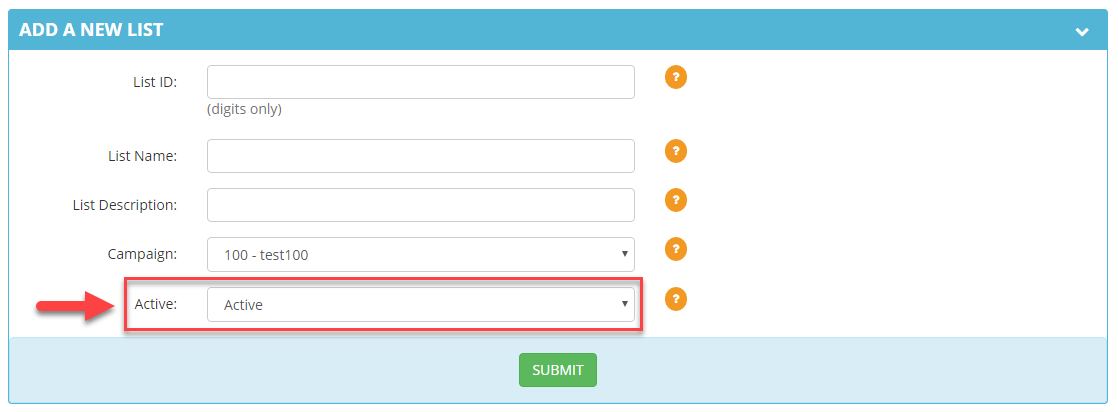 Step 7. Click Submit.
Step 8. You will receive a confirmation at the top and your list settings will appear for further configuration, if desired.
