The following are instructions on how to set up the softphone, Zoiper, in any case, that the integrated webphone will not be used.
Note: Before using Zoiper, the webphone needs to be disabled in the admin portal. Contact your manager or customer support if you are not sure if this step has been taken.
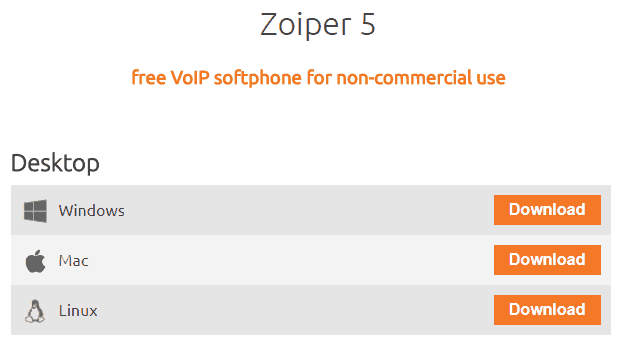
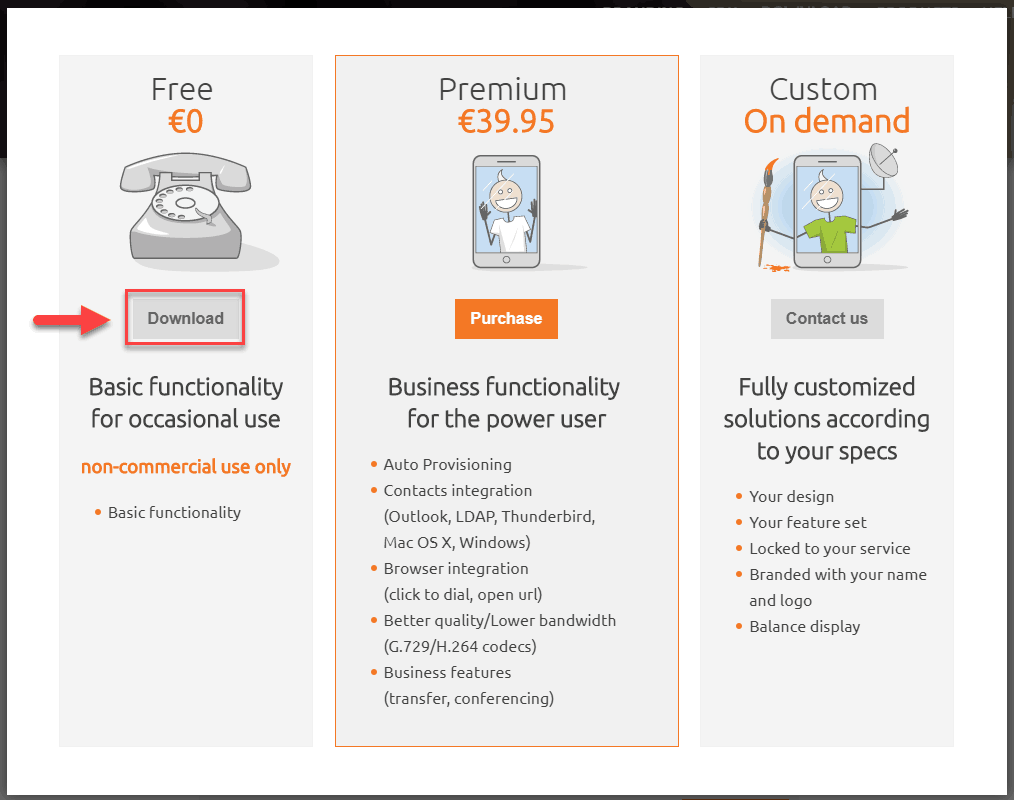
Step 1. Download and install Zoiper. You can download here and its free: https://www.zoiper.com/en/voip-softphone/download/current
Follow the instructions provided by Zoiper to complete the installation.
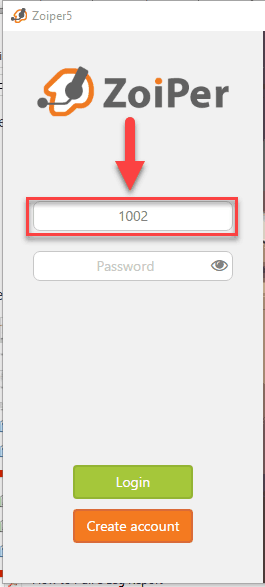
Step 2. Enter your Username.
Username/Login: This is the phone login you normally use to log into the agent screen. Ex. 1002
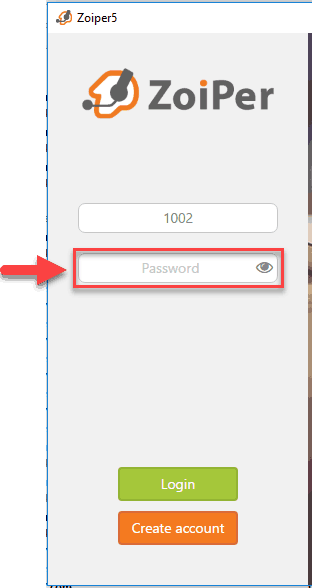
Step 3. Enter your password. This is the phone password you normally use to log into the agent screen. Ex. 1002
Step 3. Click Login.
Step 4. Enter the hostname (Domain) for your server. It will look like the URL below except with your server number number filled in which you can find in the URL address bar of the main agent login page. Note: Do not enter https://
Ex. agXXX-ag1.evs7parrot.com
Step 5. Click Next.Step 6. Click Skip to skip the Optional Authentication and Outbound proxy.
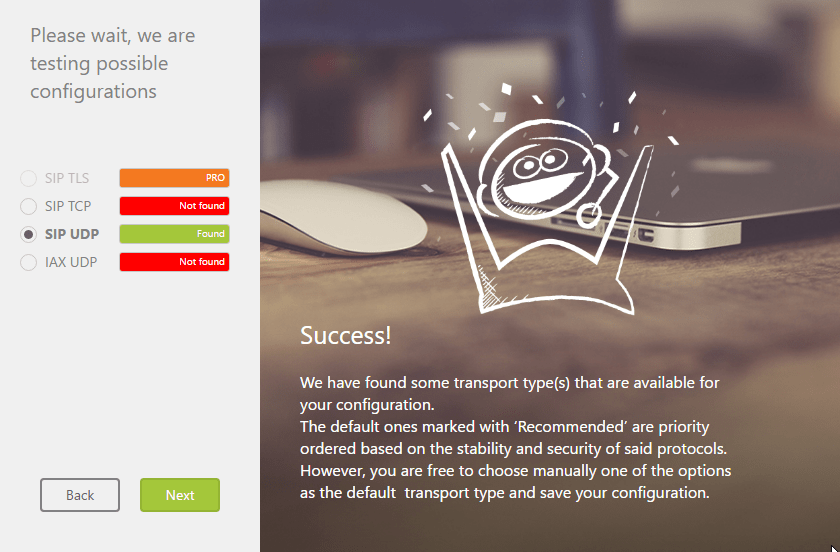
Step 7. Wait for Zoiper to configure settings. You will receive a confirmation message when configurations have been tested. If you receive an error message, try manually entering the hostname again.
Step 8. Click Next.Step 9. A green checkmark will appear next to the account to confirm the phone has been registered.
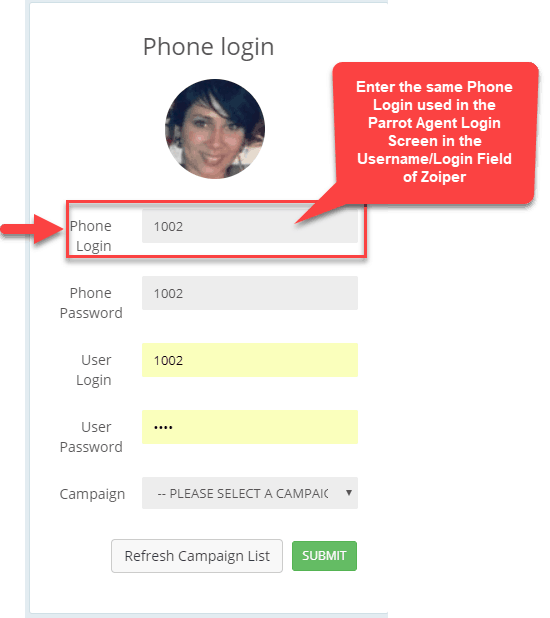
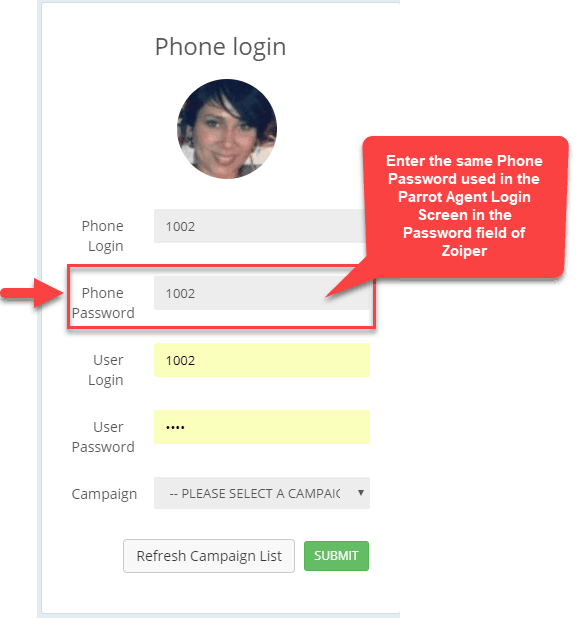
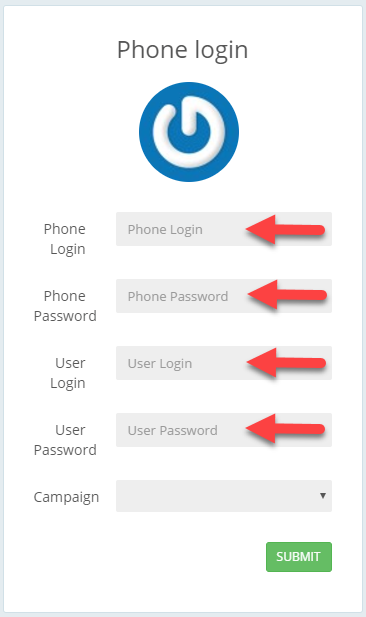
Step 10. Go to the Parrot Agent login page and enter your Phone Login, Phone Password, User Login, and User Password.
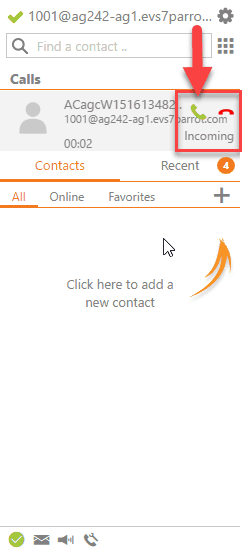
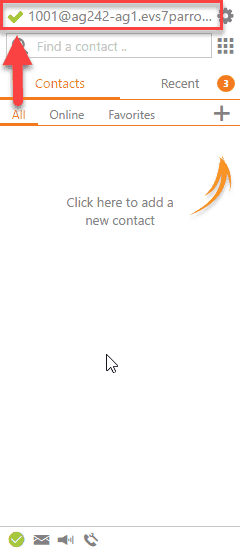
Step 11. Upon login, you will hear a ring. Answer the call in Zoiper to make the initial phone connection. Note that he agent will still primarily interact in the Parrot web interface when making and receiving calls.

 Follow the instructions provided by Zoiper to complete the installation.
Step 2. Enter your Username.
Username/Login: This is the phone login you normally use to log into the agent screen. Ex. 1002
Follow the instructions provided by Zoiper to complete the installation.
Step 2. Enter your Username.
Username/Login: This is the phone login you normally use to log into the agent screen. Ex. 1002
 Step 3. Enter your password. This is the phone password you normally use to log into the agent screen. Ex. 1002
 Step 3. Click Login.
Step 4. Enter the hostname (Domain) for your server. It will look like the URL below except with your server number number filled in which you can find in the URL address bar of the main agent login page. Note: Do not enter https://
Ex. agXXX-ag1.evs7parrot.com
Step 3. Click Login.
Step 4. Enter the hostname (Domain) for your server. It will look like the URL below except with your server number number filled in which you can find in the URL address bar of the main agent login page. Note: Do not enter https://
Ex. agXXX-ag1.evs7parrot.com
 Step 8. Click Next.
Step 9. A green checkmark will appear next to the account to confirm the phone has been registered.
Step 8. Click Next.
Step 9. A green checkmark will appear next to the account to confirm the phone has been registered.
 Step 10. Go to the Parrot Agent login page and enter your Phone Login, Phone Password, User Login, and User Password.
 Step 11. Upon login, you will hear a ring. Answer the call in Zoiper to make the initial phone connection. Note that he agent will still primarily interact in the Parrot web interface when making and receiving calls.